


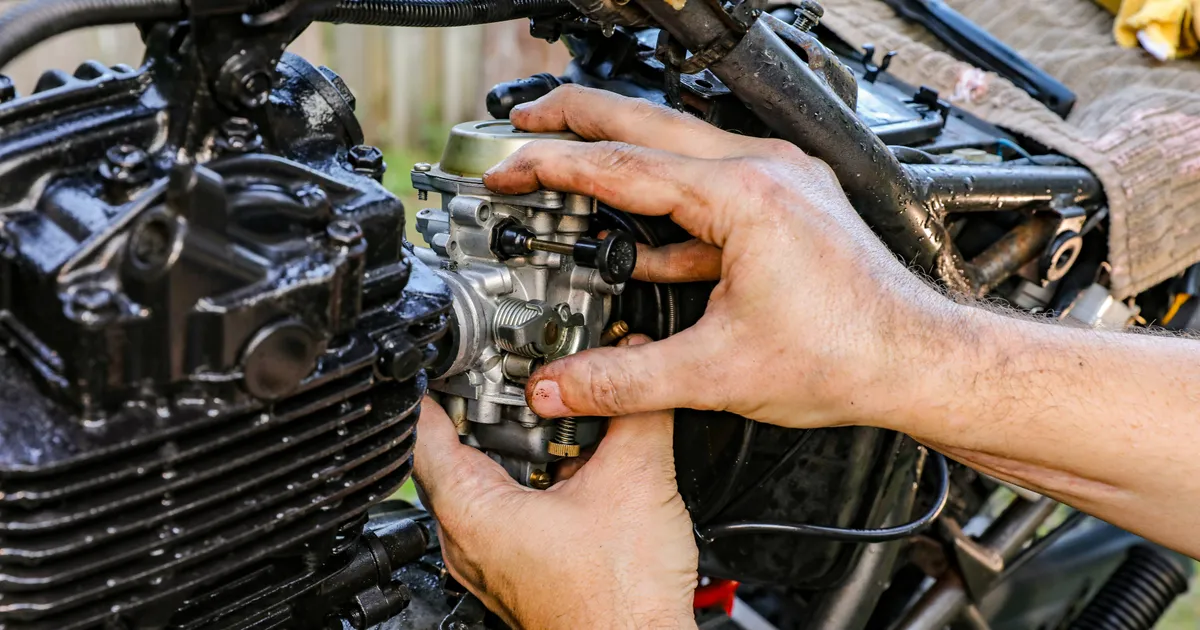
Performing a comprehensive throttle cable inspection and lubrication routine is a fundamental maintenance task that ensures smooth, responsive engine control for any mechanical vehicle. Whether you are operating a high-performance motorcycle, a classic car, or a piece of heavy machinery, the condition of your throttle linkage directly impacts your safety and the machine’s overall efficiency. By 2026, many professional mechanics still rely on manual cable actuation, emphasizing the importance of preventing internal fraying, rust, and debris accumulation. Neglecting these components can lead to a sticky throttle, increased lever resistance, or even catastrophic failure during operation. This guide will walk you through the professional-grade techniques required to assess cable integrity and apply lubrication effectively, ensuring your vehicle remains reliable and fully operational under diverse environmental conditions.
Preparation and Safety Protocols
Before beginning any mechanical maintenance, ensure the engine is completely cool and the ignition system is disabled to prevent accidental starting. Safety is paramount when working around throttle assemblies, as an unintended surge in RPM can lead to severe injury or equipment damage. Secure your workspace in a well-lit, dry environment and organize your tools, including a set of metric and imperial wrenches, needle-nose pliers, a dedicated cable lubrication tool, and high-quality synthetic lubricant. Consult your manufacturer’s service manual to determine if your specific model utilizes a push-pull cable system or a simpler single-cable design, as this will dictate your approach to disconnection and adjustment.
Clean the exterior of the throttle housing and the cable entry points with a mild degreaser to prevent contaminants from migrating into the inner sheath during the maintenance process. It is vital to inspect the cable’s physical path, looking for sharp bends, kinks, or contact points where vibration might cause premature wear against the chassis. By 2026, industry standards for preventive maintenance suggest using a soft-bristled brush to remove road grit from the cable ends. Once the area is clean, perform a baseline test of the throttle’s snap-back response. A healthy system should return to the idle position immediately upon releasing the grip or pedal, regardless of the steering angle or handlebar position.
Visual Inspection and Wear Detection
The primary goal of a visual inspection is to identify signs of fraying or sheath degradation before they cause a total system failure. Start by retracting the protective rubber boots at the cable ends to reveal the inner wire strands; even a single broken strand is grounds for immediate replacement. Check for signs of oxidation or rust, which often indicate that the internal Teflon or nylon liner is damaged. If you notice the cable is beginning to unravel or appears flattened in specific areas, do not attempt to lubricate it—replace it immediately. Reliable parts information and diagrams can often be found on RevZilla, which offers extensive resources for vehicle maintenance.
In addition to the wire itself, examine the barrel ends and adjusters for signs of excessive play or stripped threads. A loose adjuster can vibrate during operation, leading to inconsistent throttle response or stalling at idle. Check the throttle tube or pedal assembly for cracks or debris that might impede smooth rotation. Using a flashlight, trace the cable from the control unit to the carburetor or throttle body to ensure there is sufficient slack for full movement. If the cable is routed too tightly, it will bind under load, causing an erratic feel that makes precise modulation difficult, especially in technical low-speed maneuvers or precise driving scenarios.
Lubrication Techniques and Tools
Applying lubricant effectively requires a cable-specific pressure tool, which creates a hermetic seal over the cable housing. This specialized tool forces the lubricant through the entire length of the sheath, ensuring the inner wire is fully coated. Select a high-quality, Teflon-based, or dry-film lubricant rather than heavy grease, which can attract dirt and eventually create a grinding paste inside the housing. As you inject the lubricant, watch for it to emerge from the opposite end of the cable, signaling complete saturation. Once the lubricant flows freely, cycle the cable back and forth several times to distribute the product evenly along the entire contact surface.
Selecting the Right Lubricants
Not all lubricants are suitable for throttle cables, and using the wrong product can cause the internal liners to swell or break down over time. Avoid thick oils or silicones that become tacky in cold weather, as these can drastically increase lever resistance. For most modern applications, a lightweight synthetic penetrating oil is the industry standard. Always check the container to ensure it is compatible with the specific materials used in your vehicle’s cable construction. For those looking for technical specifications on chemical compatibility, the Society of Automotive Engineers provides detailed documentation on automotive fluid standards and their interactions with common mechanical components.
Performance and Comparison Analysis
Choosing the right maintenance frequency depends heavily on your riding environment and the age of your equipment. The following table compares standard cable maintenance intervals based on typical usage conditions to help you determine your personal service schedule for 2026 and beyond.
| Environment | Inspection Interval | Lubrication Frequency |
|---|---|---|
| Off-road/Dusty | Every 50 hours | Every 100 hours |
| Street/Commuter | Every 5,000 miles | Every 10,000 miles |
| Humid/Coastal | Every 3 months | Every 6 months |
Maintaining a regular schedule prevents the “stiction” that occurs when lubricants dry out or become contaminated. By comparing these intervals, you can optimize your garage time and ensure that your throttle remains responsive. Consistent maintenance not only preserves the longevity of the cable but also protects the throttle return springs and linkage components from unnecessary strain. If you operate in extremely harsh conditions, you might consider installing aftermarket sealed cable kits, which feature additional moisture barriers that significantly extend the service life of the inner wire and reduce the frequency of manual lubrication requirements.
Adjustment and Final Calibration
After lubrication, reattach the cable and perform a precise adjustment to set the free-play. Free-play is the small amount of movement required before the throttle begins to open the butterfly valve or slide; it is a critical safety buffer that prevents the engine from revving when the handlebars are turned. Adjust the cable tension until you achieve the manufacturer-specified amount of play, typically 2 to 4 millimeters at the grip or pedal. Once set, tighten the lock nut securely, ensuring the adjuster does not move during operation. It is essential to test this adjustment while the engine is running and the vehicle is in neutral.
Rotate the handlebars from full left to full right while the engine is idling to ensure the RPM does not climb. If the idle speed increases during this test, the cable is routed incorrectly or adjusted too tightly, creating a dangerous condition where steering could cause unintended acceleration. Finally, verify that the throttle returns crisply to the idle position without any hesitation. If the return is sluggish, check the return springs on the carburetor or throttle body, as these may require cleaning or replacement. A well-calibrated throttle system provides the mechanical feedback necessary for confident control, making every journey safer and more enjoyable.
Key Takeaways
- Always prioritize safety by disabling the ignition before handling throttle linkages.
- Inspect cable ends for fraying or rust, as these indicate immediate failure risks.
- Utilize a dedicated cable lubricant tool to ensure complete penetration of the sheath.
- Avoid heavy greases that attract dirt and debris into the cable housing.
- Adjust cable free-play to manufacturer specifications to ensure safe steering operation.
- Maintain a consistent service schedule based on your specific environmental conditions.
Frequently Asked Questions
How can I tell if my throttle cable needs replacing?
If you observe fraying strands, significant rust, or if the throttle feels “crunchy” even after lubrication, the inner cable is likely damaged and must be replaced to prevent snapping.
Can I use WD-40 to lubricate my cables?
While standard WD-40 is an excellent cleaner and water displacer, it is not a long-term lubricant and can eventually dry out, leaving the cable susceptible to friction and rust.
What should I do if my throttle sticks after cleaning?
A sticking throttle is dangerous; if lubrication does not resolve the issue, check the routing for sharp kinks and inspect the return springs for loss of tension or debris buildup.
Are aftermarket cables better than OEM parts?
OEM cables are designed specifically for your vehicle, but high-quality aftermarket options often feature improved liners or stainless steel construction for better durability in harsh environments.
How often should I check my throttle cable free-play?
You should verify your throttle free-play every time you perform routine maintenance or if you notice any changes in how the throttle lever or pedal feels during normal operation.
Conclusion
Mastering the art of throttle cable maintenance is a vital skill for any enthusiast, ensuring your vehicle remains responsive, predictable, and safe. By following these professional inspection and lubrication procedures, you protect your investment from premature wear and avoid the dangers of mechanical failure. Remember that consistency is the key to longevity; keeping a proactive schedule will save you time and money in the long run. As you head into 2026, keep these technical insights in mind to maintain peak performance and enjoy the seamless, precise control that a perfectly tuned throttle system provides every time you hit the road.