
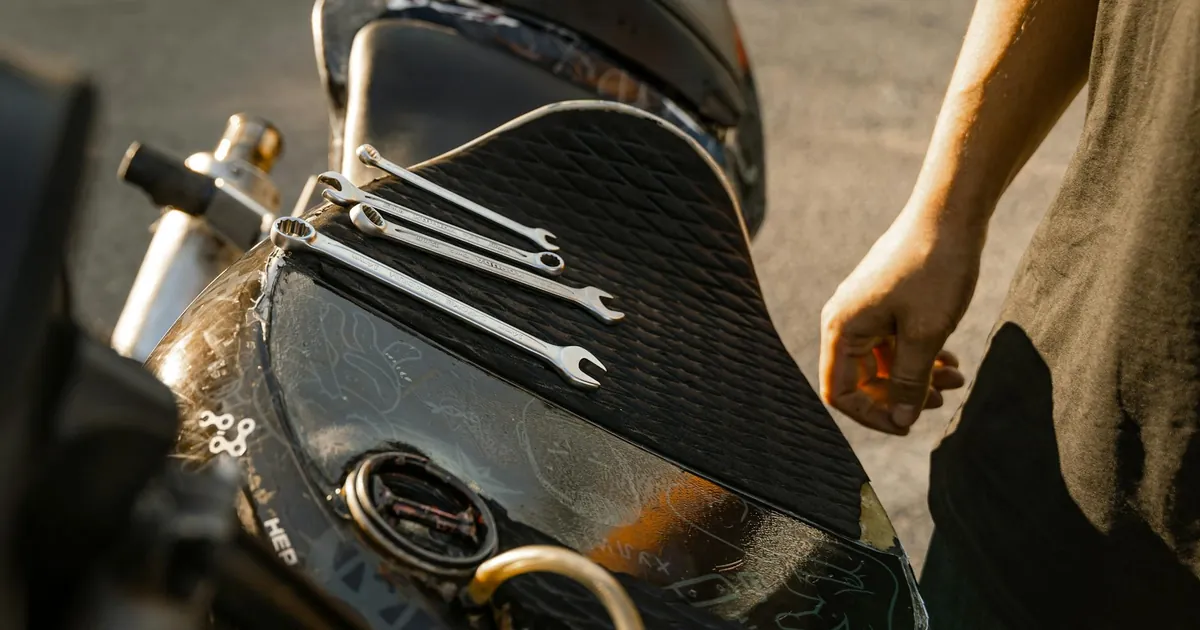
Basic motorcycle care isn’t just about keeping your bike looking sharp—it’s the difference between a machine that lasts 50,000 miles and one that barely makes it past 10,000. Whether you ride a sleek sportbike, a rugged adventure tourer, or a trusty commuter, neglecting routine maintenance accelerates wear, drains performance, and turns minor issues into wallet-draining repairs. The good news? With a structured checklist and a little consistency, you can extend your motorcycle’s lifespan, improve reliability, and even enhance resale value. This guide breaks down the essentials of motorcycle upkeep into actionable steps, blending manufacturer recommendations with real-world riding wisdom. From fluid changes to chain tension, we’ll cover what to check, when to check it, and why it matters—so you can spend less time in the garage and more time on the road.
What Is a Basic Motorcycle Care Checklist?
A basic motorcycle care checklist is a systematic approach to maintaining your bike’s critical components, ensuring optimal performance, safety, and longevity. Think of it as a health regimen for your motorcycle: regular inspections, fluid replacements, and adjustments that prevent premature wear and costly breakdowns. This checklist typically includes engine oil changes, tire pressure checks, brake system inspections, chain or belt maintenance, and electrical system diagnostics. While the specifics may vary by make and model, the core principles remain universal—cleanliness, lubrication, and timely interventions. Following this routine not only keeps your bike running smoothly but also helps you spot potential issues before they escalate into major problems.
Engine Oil and Filter Maintenance

Engine oil is the lifeblood of your motorcycle, lubricating moving parts, reducing friction, and dissipating heat. Over time, oil breaks down due to heat and contaminants, losing its effectiveness. Most manufacturers recommend changing the oil and filter every 3,000 to 5,000 miles, but this interval can vary based on riding conditions. For instance, frequent short trips or extreme temperatures may require more frequent changes. Always use the oil grade specified in your owner’s manual—synthetic oils offer better protection but may not be necessary for all bikes. When changing the oil, don’t forget to replace the oil filter, as it traps debris that could otherwise circulate through the engine. A clogged filter restricts flow, forcing the engine to work harder and increasing wear.
Choosing the Right Oil for Your Bike
Not all motorcycle oils are created equal. The right oil depends on your bike’s engine type, climate, and riding style. For example, high-performance sportbikes often require full synthetic oil to handle extreme heat and stress, while cruisers or older bikes may run fine on conventional or semi-synthetic blends. Viscosity is another critical factor—thinner oils (like 10W-40) flow better in cold weather, while thicker oils (like 20W-50) provide better protection in high temperatures. Always check your owner’s manual for the manufacturer’s recommendations. Using the wrong oil can lead to poor lubrication, increased engine wear, or even catastrophic failure. If you’re unsure, consult a trusted mechanic or refer to resources like this related article on daily motorcycle maintenance for guidance.
Step-by-Step Oil Change Process
Changing your motorcycle’s oil is a straightforward task that can save you money and extend your engine’s life. Start by warming up the engine for a few minutes to help the oil flow more easily. Place a drain pan under the bike and remove the drain plug, allowing the old oil to fully drain. While the oil is draining, remove the old oil filter using a filter wrench. Before installing the new filter, apply a thin layer of fresh oil to the rubber gasket to ensure a proper seal. Once the old oil has drained, reinstall the drain plug and fill the engine with the recommended amount of new oil. Finally, start the engine and let it run for a minute to circulate the oil, then check the oil level and top off if necessary. Dispose of the old oil responsibly—many auto parts stores offer free recycling.
Tire Care and Pressure Checks

Your motorcycle’s tires are the only contact points between you and the road, making their condition critical to safety and performance. Underinflated tires reduce fuel efficiency, cause uneven wear, and increase the risk of a blowout, while overinflated tires compromise grip and ride comfort. Check your tire pressure at least once a week using a reliable gauge, and always do so when the tires are cold. Refer to your owner’s manual or the tire manufacturer’s recommendations for the correct pressure—don’t rely on the maximum PSI listed on the tire sidewall, as this is the absolute limit, not the ideal setting. Additionally, inspect your tires for cracks, punctures, or embedded objects, and check the tread depth using a tread depth gauge or the “penny test.” Replace tires when the tread wears down to 2/32 of an inch to maintain optimal traction.
Signs of Tire Wear and When to Replace
Tires don’t last forever, and recognizing the signs of wear can prevent dangerous situations. Uneven wear, such as cupping or flat spots, often indicates suspension issues or improper inflation. Cracks in the sidewall or tread are a sign of aging rubber and can lead to sudden failure. Bulges or blisters on the tire surface suggest internal damage and require immediate replacement. If you notice frequent air loss, it could be due to a slow leak or a damaged valve stem. Most motorcycle tires last between 5,000 and 15,000 miles, depending on riding style, road conditions, and tire quality. However, even if your tires have plenty of tread left, they should be replaced after 5–7 years due to rubber degradation. For more tips on tire maintenance, check out this guide on daily motorcycle care.
Balancing and Aligning Your Tires

Properly balanced and aligned tires ensure a smooth ride and even wear. Unbalanced tires cause vibrations, especially at higher speeds, which can lead to premature wear on suspension components and an uncomfortable ride. If you notice vibrations in the handlebars or seat, it’s time to have your tires balanced. This process involves attaching small weights to the wheel rim to counterbalance any heavy spots. Wheel alignment is equally important—misaligned wheels can cause the bike to pull to one side, reduce handling precision, and accelerate tire wear. While balancing can be done at home with the right tools, alignment is best left to professionals with specialized equipment. Regularly checking and maintaining your tires not only improves safety but also enhances fuel efficiency and ride quality.
Brake System Inspection and Maintenance
Your motorcycle’s brakes are arguably its most critical safety feature, and neglecting them can have dire consequences. A well-maintained brake system ensures reliable stopping power, whether you’re navigating city traffic or tackling twisty mountain roads. Start by checking the brake fluid level in the reservoir—low fluid can indicate worn brake pads or a leak in the system. Brake fluid absorbs moisture over time, reducing its effectiveness and potentially causing corrosion in the brake lines. Most manufacturers recommend replacing brake fluid every 1–2 years, regardless of mileage. Inspect the brake pads for wear, replacing them if the friction material is less than 2mm thick. Squealing or grinding noises are clear signs that your pads need attention. Additionally, check the brake lines for cracks, leaks, or bulges, and ensure the calipers move freely without sticking.
How to Check Brake Pad Wear

Brake pads wear down with use, and monitoring their thickness is essential for safe riding. Most brake pads have wear indicators—small grooves or notches that disappear as the pad material thins. If these indicators are no longer visible, it’s time to replace the pads. You can also measure the pad thickness with a caliper or ruler. If the friction material is less than 2mm thick, replace the pads immediately. Ignoring worn pads can damage the brake rotors, leading to costly repairs. When inspecting the pads, also check for uneven wear, which may indicate a sticking caliper or misaligned brake components. If you’re unsure about the condition of your brake pads, consult a professional mechanic or refer to this related article for detailed maintenance tips.
Bleeding the Brake System
Air in the brake lines reduces braking efficiency and can make the lever feel spongy. Bleeding the brake system removes air bubbles and restores firm, responsive braking. This process involves flushing old brake fluid from the system and replacing it with fresh fluid. You’ll need a brake bleeding kit, fresh brake fluid, and a helper to pump the brake lever while you open and close the bleed valve. Start by topping off the brake fluid reservoir, then attach the bleeding kit to the bleed valve on the caliper. Have your helper pump the brake lever until it feels firm, then open the bleed valve to release air and old fluid. Close the valve before the lever reaches the handlebar, and repeat the process until the fluid runs clear and free of bubbles. Always use the brake fluid type specified in your owner’s manual—mixing types can damage the system.
Chain and Sprocket Maintenance
A well-maintained chain and sprocket system ensures smooth power transfer from the engine to the rear wheel, improving acceleration and fuel efficiency. Neglecting this critical component can lead to premature wear, poor performance, and even chain failure. Start by checking the chain tension—too loose, and it can derail or slap against the swingarm; too tight, and it strains the engine and transmission. Most motorcycles require a slight amount of slack, typically 1–1.5 inches of free play at the midpoint of the chain. Inspect the chain for signs of wear, such as stiff links, rust, or excessive stretch. A worn chain accelerates sprocket wear, so replace both components together if either shows significant damage. Lubrication is key—clean the chain with a dedicated chain cleaner, then apply a high-quality chain lubricant to reduce friction and prevent corrosion.
Cleaning and Lubricating Your Chain

A clean, well-lubricated chain lasts longer and performs better. Start by placing your bike on a stand to elevate the rear wheel, allowing the chain to rotate freely. Use a chain cleaner and a soft brush to remove dirt, grime, and old lubricant. Avoid using harsh solvents or high-pressure water, as these can damage the O-rings in sealed chains. Once the chain is clean and dry, apply a thin layer of chain lubricant, focusing on the inner links where the rollers contact the sprocket. Let the lubricant sit for a few minutes to penetrate, then wipe off any excess to prevent fling-off. Regular cleaning and lubrication—ideally every 500 miles or after riding in wet conditions—will extend your chain’s lifespan and improve performance.
When to Replace Your Chain and Sprockets
Chains and sprockets wear out over time, and replacing them together ensures optimal performance and prevents premature wear. Signs that your chain needs replacement include excessive stretch (measured with a chain wear tool), stiff or kinked links, and visible rust or corrosion. Sprockets should be replaced if the teeth are hooked, pointed, or worn down significantly. Riding with a worn chain or sprocket can lead to poor shifting, reduced power transfer, and even chain failure. Most chains last between 15,000 and 25,000 miles, depending on riding conditions and maintenance. If you’re unsure about the condition of your chain or sprockets, consult a professional mechanic or refer to this maintenance guide for additional insights.
Battery Health and Electrical System Checks
Your motorcycle’s battery powers everything from the ignition system to the lights and electronics, making its health crucial to reliable operation. A weak or dead battery can leave you stranded, especially in cold weather when batteries lose capacity. Start by checking the battery terminals for corrosion, which appears as a white, powdery substance. Clean the terminals with a mixture of baking soda and water, then apply a thin layer of dielectric grease to prevent future corrosion. Test the battery voltage with a multimeter—fully charged, it should read around 12.6 volts. If the voltage drops below 12.4 volts, it’s time to recharge or replace the battery. Most motorcycle batteries last 3–5 years, but extreme temperatures and infrequent use can shorten their lifespan. If your bike sits idle for long periods, consider using a battery tender to maintain charge and prevent sulfation.
Testing and Charging Your Motorcycle Battery
Testing your motorcycle battery is a simple process that can save you from unexpected breakdowns. Use a multimeter to measure the battery’s voltage—if it reads below 12.4 volts, it needs charging. Connect a smart charger to the battery, following the manufacturer’s instructions. Avoid using a car charger, as it can deliver too much current and damage the battery. If the battery fails to hold a charge or shows signs of swelling or leakage, it’s time for a replacement. When installing a new battery, ensure it’s the correct type and size for your bike, and always connect the positive terminal first to prevent sparks. Regularly testing and charging your battery will keep your motorcycle’s electrical system running smoothly.
Troubleshooting Common Electrical Issues
Electrical problems can be frustrating, but many issues are easy to diagnose and fix. If your bike won’t start, check the battery voltage first—low voltage can prevent the starter from engaging. If the battery is fine, inspect the fuses and relays for signs of damage or corrosion. A blown fuse can cause specific systems, like the lights or horn, to fail. Loose or corroded wiring connections are another common culprit—check for frayed wires or loose terminals, especially near the battery and ignition switch. If your bike’s lights are dim or flickering, it could indicate a weak battery or a faulty alternator. For more complex issues, consult a professional mechanic or refer to this related article for troubleshooting tips.
Air Filter and Fuel System Maintenance
A clean air filter ensures your engine breathes properly, improving performance and fuel efficiency. Over time, dust, dirt, and debris clog the filter, restricting airflow and causing the engine to work harder. Most manufacturers recommend inspecting the air filter every 5,000 miles and replacing it every 10,000–15,000 miles, depending on riding conditions. If you frequently ride in dusty or dirty environments, you may need to clean or replace the filter more often. To inspect the filter, remove the airbox cover and check for excessive dirt or damage. Paper filters can be cleaned with compressed air, while foam filters require washing with a dedicated cleaner and re-oiling. A clogged air filter can reduce power, increase fuel consumption, and even cause engine damage if left unchecked.
Cleaning vs. Replacing Your Air Filter
Cleaning your air filter can extend its lifespan, but not all filters are reusable. Paper filters are typically disposable and should be replaced when dirty. Foam and cotton filters, on the other hand, can be cleaned and re-oiled. To clean a foam filter, remove it from the airbox and wash it with warm, soapy water. Rinse thoroughly and let it dry completely before applying a thin layer of filter oil. Avoid using gasoline or harsh solvents, as these can damage the filter material. Once the filter is clean and oiled, reinstall it in the airbox. Regularly cleaning or replacing your air filter ensures optimal airflow and engine performance.
Fuel System Cleaning and Additives
The fuel system is another critical component that requires regular maintenance. Over time, fuel injectors or carburetors can become clogged with deposits, reducing performance and fuel efficiency. Using a fuel additive can help clean the system and prevent buildup. Look for additives that contain detergents to break down carbon deposits and improve fuel flow. If your bike has been sitting idle for an extended period, drain the old fuel and refill with fresh gasoline to prevent gumming and varnish buildup. For bikes with carburetors, consider cleaning the jets and passages with a dedicated carb cleaner. Regular fuel system maintenance ensures smooth operation and prevents costly repairs.
Key Takeaways
- Regular oil and filter changes are the foundation of engine longevity—stick to the manufacturer’s recommended intervals.
- Check tire pressure and tread depth weekly to ensure safety and optimal performance.
- Inspect brake pads, fluid, and lines regularly to maintain reliable stopping power.
- Clean and lubricate your chain every 500 miles to prevent premature wear and improve power transfer.
- Test and maintain your battery to avoid unexpected breakdowns, especially in cold weather.
- Replace air filters as needed to ensure proper airflow and engine performance.
- Use fuel additives and fresh gasoline to keep your fuel system clean and efficient.
- Address minor issues promptly to prevent them from becoming major, costly repairs.
“A motorcycle is only as reliable as the care you put into it. Skipping maintenance might save you time today, but it’ll cost you dearly down the road. The best riders I know treat their bikes like partners—regular check-ups, timely repairs, and a little extra attention when it’s needed. That’s how you build a machine that lasts.”
—Mark Reynolds, Master Motorcycle Technician and Former AMA Mechanic
Frequently Asked Questions
How often should I change my motorcycle’s engine oil?
Most manufacturers recommend changing your motorcycle’s engine oil every 3,000 to 5,000 miles, but this can vary based on riding conditions. If you frequently ride in extreme heat, dusty environments, or stop-and-go traffic, you may need to change the oil more often. Always refer to your owner’s manual for the specific interval for your bike. Using high-quality oil and replacing the oil filter with every change will help extend your engine’s lifespan.
What’s the best way to store my motorcycle for the winter?
Proper winter storage is essential to prevent damage and ensure your bike starts smoothly in the spring. Start by cleaning the bike thoroughly to remove dirt and grime. Change the oil and filter to prevent contaminants from sitting in the engine. Fill the fuel tank and add a fuel stabilizer to prevent gumming. Remove the battery and store it in a cool, dry place, using a battery tender to maintain charge. Inflate the tires to the recommended pressure and place the bike on a stand to prevent flat spots. Cover the bike with a breathable cover to protect it from dust and moisture. For more tips, check out this related article on motorcycle maintenance.
How do I know if my motorcycle’s chain needs replacing?
Signs that your motorcycle’s chain needs replacing include excessive stretch (measured with a chain wear tool), stiff or kinked links, and visible rust or corrosion. If the chain has more than 1–1.5 inches of free play at the midpoint, it’s likely stretched beyond its useful life. Additionally, if the sprockets show signs of wear, such as hooked or pointed teeth, it’s best to replace both the chain and sprockets together. Riding with a worn chain can lead to poor shifting, reduced power transfer, and even chain failure.
Can I use car oil in my motorcycle?
No, you should never use car oil in your motorcycle. Motorcycle engines have different lubrication requirements, as they often share oil with the transmission and clutch. Car oils contain friction modifiers that can cause clutch slippage in motorcycles. Always use oil specifically designed for motorcycles, and refer to your owner’s manual for the recommended grade and type. Using the wrong oil can lead to poor lubrication, increased engine wear, and even catastrophic failure.
What’s the ideal tire pressure for my motorcycle?
The ideal tire pressure for your motorcycle depends on the make, model, and riding conditions. Always refer to your owner’s manual or the tire manufacturer’s recommendations for the correct pressure. Avoid using the maximum PSI listed on the tire sidewall, as this is the absolute limit, not the ideal setting. Check your tire pressure at least once a week using a reliable gauge, and always do so when the tires are cold. Proper tire pressure ensures optimal grip, handling, and fuel efficiency.
How often should I clean my motorcycle’s air filter?
Most manufacturers recommend inspecting your motorcycle’s air filter every 5,000 miles and replacing it every 10,000–15,000 miles, depending on riding conditions. If you frequently ride in dusty or dirty environments, you may need to clean or replace the filter more often. Paper filters are typically disposable and should be replaced when dirty, while foam and cotton filters can be cleaned and re-oiled. Regularly cleaning or replacing your air filter ensures optimal airflow and engine performance.
What should I do if my motorcycle’s brakes feel spongy?
If your motorcycle’s brakes feel spongy, it’s likely due to air in the brake lines or low brake fluid. Start by checking the brake fluid level in the reservoir—if it’s low, top it off with the recommended fluid type. If the fluid level is fine, you may need to bleed the brake system to remove air bubbles. This process involves flushing old brake fluid from the system and replacing it with fresh fluid. If the problem persists, inspect the brake lines for leaks or damage, and check the brake pads for wear. If you’re unsure about the issue, consult a professional mechanic for a thorough inspection.
Your motorcycle is more than just a machine—it’s a companion on the road, a tool for adventure, and an investment worth protecting. By following this basic motorcycle care checklist, you’re not just maintaining a vehicle; you’re ensuring every ride is safe, smooth, and enjoyable. The key to longevity lies in consistency: small, regular efforts prevent big, costly problems down the line. Whether it’s checking tire pressure before a long trip or changing the oil on schedule, these habits add up to a bike that runs like new for years to come. So grab your tools, set a maintenance schedule, and give your motorcycle the care it deserves. After all, the best rides start with a well-maintained machine—and the open road is waiting.